Showing posts with label Easy recipes. Show all posts

Tuesday, April 29, 2014

Red Spinach Pomegranate Rice Pilaf/ Pulav


This iron rich vegetable can be used to make variety of dishes. Regular stir-fry or add in the dal curry, it always gives a nice aromatic taste. My mom would buy these fresh from the vegetable vendors who would come on his bicycle, and shout all the green vegetables names on top of his voice, so everyone in the neighborhood could hear him. They were usually really fresh and mom would end up buying whole lot than needed. But she would always end up using them. My love of greens comes from being used to so many greens all the time being cooked at home.

This particular variety of red spinach was rare to find in mid-west. But here I see them in abundance. I see a big fresh bunch at the grocers and I go for it. These have red stems and also red at the edge where the stem meets leaf. When added to the rice, it not only enhances the flavors, it gives a natural red color to the rice. Some of these are my tactics to get my kids introduced to as many vegetables as I can. :o)

Prep Time: 20 min | Cooking Time: 15 min | Serves: Family of 4

Ingredients:
Cooked Rice (Preferably cold/ left over) - 3 Cups
Red Spinach - a bunch
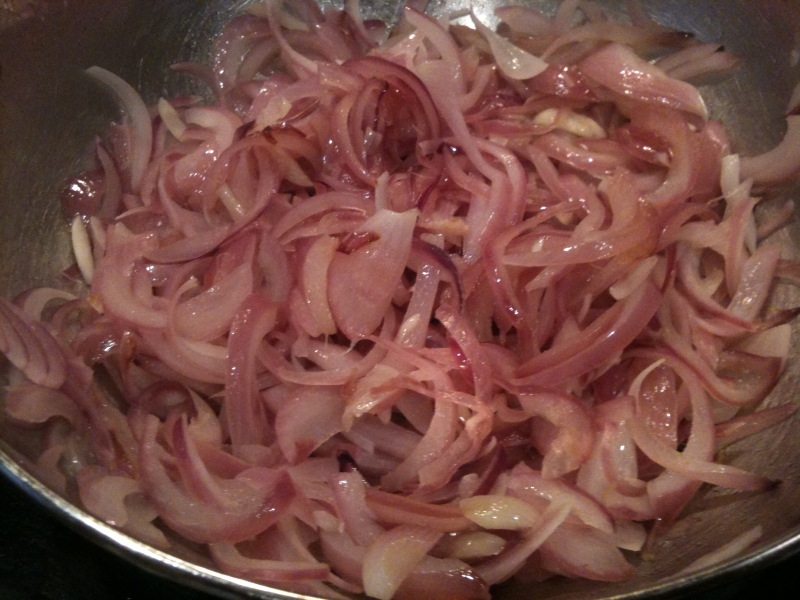
Onion - 1 large (chopped)
Tomato - 1 large (chopped)
Garlic - 3 pods (chopped)
Soy Sauce - 1 tbsp.
Fish Sauce (optional) - 2 tsp.
Sriracha Chili Sauce - 1 tsp.
Salt to taste (1/2 tsp.)
Sesame oil - 2 tsp.
Pomegranate seeds - 1 Cup

Method of Preparation:
 ~ Wash and rinse the greens. Soak it in cold water for atleast 10 minutes for all the dirt to settle down.
~ Once cleaned, chop them fine and keep it aside.
~ In a wide pan, heat sesame oil, add chopped onion and garlic. Cook them until onion is translucent.
~ Add tomato and red spinach, fry for few minutes and add all three sauces.
~ Once tomato is cooked, add salt and rice. Mix them all evenly. Now add half of the pomegranate seeds and give a quick mix and switch off the heat.
~ Serve it topped with remaining pomegranate.


Linking this recipe to
HearthAndSoulBlogHopProjectInspiredTurnItUpTuesdayAnythingGoesRecipeOfTheWeekShareYourStuffCreativeCornerDareToShareTryANewRecipeBragAboutItFoodFridayFavoriteThingsFridayFrenzyHappinessIsHomemadeWeekendRetreatShareItSundayMeltInYourMouthMondayWhat'dYouDoThisWeekendMuchAdoAboutMondayTuesdayTalent

Thursday, March 20, 2014

Kheema Pulav/ Aromatic Rice with Ground meat


One of the easiest and quickest pulav/ Pilaf that I make. My kids LOVE it. I make this often when I have ground meat and craving for some carb. It makes a nice lunchbox recipe for kids. Here I took pictures before I mixed the rice and the kheema. Often, I mix them up and serve it to kids.

Prep Time: 5 min | Cooking Time: 15 min | Serves : 4

Ingredients:

Chicken Kheema/ Ground Meat - 1 lb/ 500 gm
Frozen Peas - 1 Cup
Chili Powder - 2 tsp.
Turmeric Powder - 1/2 tsp.
Ginger paste - 1 tsp.
Garlic - 4 to 5 cloves, chopped fine
Onion - 1 small, cut fine
Tomato - 1 medium, cut fine
Oil - 1 tbsp.
Salt - 1 tsp.
Lime Juice - 1 tsp.

For Rice:
Sona Masoori Rice - 1 Cup
Oil - 1 tsp.
Lime Juice - 1 tsp.

Method of Preparation:
~ Prepare Rice with oil and lime juice while cooking. Once done, keep it aside.
~ In a wide pan, saute onion and garlic in the oil.
~ Add tomato, ginger, turmeric and chili powder. Fry until the raw smell of tomatoes is gone, about 3 minutes.
~ Now add the ground meat and fry until they are cooked through. There shouldn't be any pink meat left.
~ Thaw frozen peas in microwave for 3 minutes and add it to the kheema.
~ Add salt to taste and a tsp of lime juice. Mix them well and top it on cooked rice. Serve hot.


Sending this to  Hearth And Soul Blog Hop Favorites event @MaNiche, ProjectInspired, TurnItUpTuesday, TastyTuesdayChefInTrainingIn&OutOfTheKitchen, AnythingGoes, RecipeOfTheWeekDoTellTuesday, ShareYourStuff, CreativePartyCreativeCorner, DareToShareTryANewRecipe, BragAboutIt, MaMade, FoodFriday, PinWorthyProjects, Sweet&SavoryFavoriteThings, ShineASpotlight, Showlicious, SaturdayNightFever, HappinessIsHomemade, ShareItSunday, MeltInYourMouthMonday, What'dYouDoThisWeekend, MuchAdoAboutMonday

Monday, November 11, 2013

Basil Zucchini Noodles with Grilled Corn


I have to admit, we are hooked on to Zucchini noodles at our home. It's so much healthier than the starchy noodles, fills you up and are super quick to make. I don't have a tool to make the zucchini noodles to come out in exact round noodles. So I just use a peeler to make flat noodles out of Zucchini. This is how they look.


Zucchini is almost out of season now, while it was in season, I was buying them from the local market. They had some of the huge ones that I had never seen before. So bring one and you are set for 2 or 3 recipes. :o)

Prep Time: 15 min | Cooking Time: 15 min | Serves : 4
* Serving Size: 2 Cup | Calories: 104 | Carbs: 20 | Fat: 2 | Protein: 6 | Sugar: 10 | Sodium: 313

Ingredients:
Zucchini - About 4 Cups of Noodles
Hot green peppers - 2
Onion - 1 small
Tomato - 3 medium
Colored Bell Pepper - 1 small
Garlic - 6 big cloves
Lemon Basil - big handful
Corn from Grilled Corn on the cob / Some roasted fresh corn - 2 Cups
Salt to taste


Method of Preparation:
~ Finely chop peppers, onion, tomato and garlic. Place all of it in a sauce pan and cook for about 5 minutes stirring once in a while. Add salt to taste.
~ Meanwhile bring water to boil in a pot and add salt. Add Zucchini noodles and cook for 3 minutes until just done. Drain the water and drop the noodles into the sauce.
~ Top it with roasted Corn and chopped Basil leaves.
~ Enjoy a nice hot one pot meal.

Disclaimer: Nutrition fact is based on ingredients that I have used and is an approximate. It is calculated using Recipe Nutrition Calculator from a health website.

Sending this healthy seasonal fresh food over to Nandoo's Eat Seasonal Food event

Wednesday, November 6, 2013

Arugula Salad Pizza


One fine day when I switched on Food Network, saw Ree of Pioneer Woman cook a Fresh Herb Pizza. It looked exactly like the one that I had fortnight ago at a family owned pizza place. And that weekend, our friend who picks up their fresh produce from a  farm where they have membership, dropped some salad greens. Stars must have aligned right, so it was a sign, and I made this beautiful looking pizza. It was an instant hit with my family. Other than younger one, who despises any green fresh thing on her food, all of us devoured it. I left half of the pizza uncovered for her and she loved every bit of it. And I am not kidding when I say all of us over ate. BTW just noticed that this is my first post with yeast. Yes! I am not afraid anymore to use yeast in my recipes.


Prep Time: 15 min | Inactive Time: 1 Hour | Cooking Time: 15 min | Serves: 4

Recipe Based on: Fresh Herb Pizza

Ingredients:

Pizza Base -
Multi-grain Flour/ AP Flour - 2 Cups
Active Dry Yeast - 1 tsp.
Warm Water - 1 Cup
Salt - 1/2 tsp.
Pepper - 1/4 tsp. Freshly ground
Light Olive Oil - 1/4 Cup
Olive Oil for drizzling - 1 tbsp.

Pizza Sauce - 1 Cup
Shredded Cheese - 1 Cup


Salad Topping -
Arugula - 1 Bunch
Pomegranate seeds - 1 tbsp.
Salt
Pepper
Lemon Juice - 1 tsp.
Olive Oil - 1 tsp.


Method of Preparation:
~ Add yeast into the warm water and let it sit for 5 minutes.
~ Meanwhile, add some salt and pepper in the flour. Mix in olive oil and combine well. Now slowly add the yeast mixture and mix until just combined.
~ Add 1 tbsp. of olive oil and just roll the dough lightly, cover the container and leave it to rise for atleast an hour in a warm place.
~ When ready to make the pizza, preheat the oven to 500 deg Fahrenheit.
~ Take out the pizza dough cover, punch the dough lightly and start rolling it out. Drizzle little oil on the pizza stone or pizza pan or sheet, and transfer the rolled out pizza on to this.
~ Top the pizza base with pizza sauce and shredded cheese
~ Bake this for 15 minutes on the bottom rack, or until the crust is golden brown.
~ Toss all the ingredients together for the salad. Top the pizza with salad and serve it.


Notes:
~ You can use different types of greens salad. Sky is the limit as to what you want to top it or what kind of salad.
~ Or can just have pizza with just sauce and cheese.
~ Store bought pizza sauce can be used or even ketchup would suffice.
~ Can serve it topped with Parmesan cheese.

Sending this yummy pizza to Vardhini's Bake Fest event

Thursday, September 19, 2013

Bhutta/ Grilled Corn on the Cob

Bhutta or Grilled corn is one of the street food that I would actually eat from the cart vendor. I am very conscious of cleanliness. Growing up in Bangalore there were numerous food vendors standing at strategic locations to attract customers. There were quite a few standing right next to all my schools. I wouldn't buy anything that was raw (cut fruits/ vegetables), had water (like pani puri) and would use their hand to mix my food.!!! Bhutta on the other hand, (ignoring the fact that lime was cut by the vendor) I would love to buy. If you would imagine, cold Bangalore evenings, with the corn sputtering on red hot charcoal, getting perfectly grilled, all customers after picking their corn, waiting patiently around and staring at their beautiful pick. Hehehe.. I am almost transported there now.


My mom would steam the corn at home in a pressure cooker. That was another experience altogether. It tastes more juicier. You can add some chili powder and salt to the water before you steam and out comes the juicy goodness. When I was in LA few years ago, my old friend Julie, who was my land lady to at that time, came to me asking if I would like to eat Elotes. I wasn't sure what she was asking. She said she was buying from the street vendor! It was Mexican street corn. We went out and saw this guy with steamed corn and he was generously applying salted butter, Cheese, Chili powder to it. I wasn't sure how the butter would be on corn & asked to hold cheese, but I have to say it was extremely delicious.


It's a season for corn here in US now. And I lug them from every visit to a store or a farm. Kiddos love it. Here is the simplest of all Grilled Corn on the Cob for you!

Prep Time: 5 min | Cooking Time : 2 min each 


Ingredients:

Corn on the cob - 4
Salt - 1 tsp.
Pepper/ Chili powder - 1 tsp.
Chaat Masala powder/ Cumin Powder - 1 tsp.
Lime - 1


Method of Preparation:

~ Remove the husks of Corn, keep the stem which would help you to hold the corn while grilling.
~ You can either use outside grill or your regular gas stove fire. Holding on to the stem or using tongs turn the corn slowly on the fire, so all the corn gets grilled. 
~ Mix Chili powder, Chaat Masala powder and salt. Cut lime into halves. Dip one half into the chili mixture and generously scrub lime over the corn, squeezing little juice of lime as you go. 
~ Yummy Bhutta is ready to be devoured!


Monday, September 16, 2013

Beetroot Bhaaji/ Beets Upkari

My favorite way of making beetroot is chutney which I have previously blogged about. Another way is this, a simple low calorie bhaaji. Beetroot is one of the vegetable that stays in the refrigerator for pretty long duration. So I put them on my grocery list the minute I run out of it. I add them to my vegetable breakfast juices, which gives it a rich bright color. Juices are for another day! Today I present you this humble root in it's simple form of bhaaji.  


Prep Time : 5 min | Cooking Time: 15 min | Serves : 2

Ingredients:

Beetroot - 2 medium size
Oil - 1 tsp.
Mustard - 1/2 tsp.
Asafoetida - 1 pinch
Urad Daal - 1 tsp.
Curry Leaves - Leaves from one spring
Red Chili - 1 split
Salt to taste


Method of Preparation:

~ Wash and peel the skin off of beetroots. Remove the hard top and bottom parts. Chop them.
~ Steam until they are little tender or pressure cook for 5 minutes. (Don't put any water in the container with beetroots)
~ In a wide pan, heat oil and add mustard.
~ Once the mustard starts spluttering, add urad daal, hing, red chili and lastly curry leaves.
~ Add the cooked beetroots, salt and mix them all thoroughly. Switch off the heat and serve it hot.


Tuesday, April 30, 2013

Banana Apple Breakfast Smoothie


I love munching on apple and even my kids. For ages I had never added any apples to my smoothies. And then one of those days when you run out of fruits and veggies to put in your smoothie and you look around.... yeah, that particular moment apples called my name. I said why not, just skip eating it today.. I never use sugar in my smoothies. Boy, I was glad that day, since I realized how sweet they are.. It was actually too sweet for me. But now it's become my sweet tooth fixer. :o) Here is how I do it, but you can make so many variations to it. I keep the skin on apples, since most of the fibers are out in the skin. Just rinse thoroughly to remove the wax on outer layer and you are good to go.

Prep Time: 5 min. | Makes : 8 oz.

Ingredients:

Banana - 1 (peeled)
Apple - 1 small (I usually use Gala apples)
Baby Carrots (optional) - 3
Instant Oatmeal - 1/2 Cup
Cold Almond/ Soy/ 2% Milk - 1/2 Cup
Cold Water - 1/2 Cup


Method of Preparation:

~ In a blender cup add water, milk and instant oatmeal.
~ Cut apple into four pieces and remove the seeds.
~ Add apple chunks, carrots and banana to the blender and mix until smooth. 
~ Enjoy the smoothie as it brightens up your day! :o)


Note: For kids, you can skip or add little oatmeal and add a scoop of vanilla ice-cream.


Sending this delicious dessert to my event Bon Vivant #14 - Spring Surprises

Tuesday, November 6, 2012

Quinoa Vegetable Pulav

Quinoa grain is high in protein content and also has a good source of phosphorous, calcium and iron. It is very useful especially for Vegetarians and Vegans who are lactose intolerant. It's pronounced as 'Kinwah' and is now readily available in many stores. I remember when I initially looked for it, had to check around two or three places before I could find it. Below recipe is a simple and quick one pot meal idea. This can be served as breakfast or used instead of rice Pulav/ Pilaf for main course. During days leading to Diwali it's hard to find time to prepare full-fledged meal. Quinoa Pulav comes handy during these times.


Prep Time - 5 min | Cooking Time: About 15 to 20 min| Serves : 4

Ingredients:

Quinoa - 1 Cup
Vegetable Broth/ Water - 2 Cup
Salt - 1 tsp.
Frozen Soy/ Edamame - 1/2 Cup
Frozen Corn - 1/2 Cup
Bell Pepper chopped - 1 cup
Fresh Basil Leaves - 4 leaves chopped fine

Method of Preparation:

~ Place Quinoa in a microwave safe bowl. Gently wash the grain with cold water couple of times. Drain the water.
~ Now add the vegetable broth, salt and all the vegetables.
~ Microwave in batches of 5 minutes twice and mix.
~ Then start microwaving in sets of 2 or 3 minutes depending upon the amount of water in the pulav.
~ Once all the liquid is dried up, add chopped basil and let it stand covered for a minute or so.
~ Fluff it with fork and serve it up with your favorite raita or pickle.


Note:
1. This is a microwave version, but you want to do the same on stovetop. Just continue to boil until all the liquid is dried up. Cover and let it sit for few minutes until fluffy.
2. For quicker version I used frozen vegetables which get cooked during microwaving of quinoa. You can separately saute the vegetables in a pan and add it to the cooked Quinoa. In this case Quinoa cooks within 10 minutes in microwave.

Sending this to following events,
Bon Vivant #10 - Festive Feasts happening at my space @Sumee's Culinary Bites.


Lets Cook #21 - Potluck @Tickling Palates
Jagruti's Celebrate Navratri & Diwali hosted @Simply.Food


Wednesday, August 22, 2012

Pita Cheese Pizza Bites

I have to say I got this idea from McCalister's Deli. Recently we discovered that kids loved Pita pizza on their menu. So later I tried out this at home and kids were excited since they were involved in making it too. Now it's a quick snack or no brainer lunch for them. It's been such a busy summer for us, so this has been featuring on our menu  more than often. I leave the kids to get it prepped as they wish and help them put it in the oven. They don't even have to wait too long to devour it.

Prep Time: 5 min| Baking Time: 5 min| Serves: 1


Ingredients:

Whole wheat Pita bread - 1
Pizza Sauce / Ketchup - 1 tbsp (as much as kiddo wants)
Shredded Cheese / Cheese Singles

Method of Preparation:

~ Preheat the oven at 300 deg Farenheit.
~ Place Pita bread on a cookie sheet and top it with pizza sauce & cheese.
~ Bake for 5 minutes, take it out and cut it into wedges and serve.


Sending this to event on my space Bon Vivant #7 - Baked Goodies


Linking this to Bake Fest hosted by FoodOMania
And to Radhika's I Love Baking event

Thursday, October 20, 2011

Microwave Coconut Burfi

This is one of the fastest recipes I came up with the other day. It was Dushera morning, DH not in town, had to get one kid on the bus and drop another one to daycare & also reach office on time… But I wanted to make something quick to offer to God for the morning puja, so pulled out condensed milk and started to put things together. It turned out nice and when I took it over to friend’s place that weekend, was asked for recipes by one and all.


Prep Time: 2 min. | Cooking Time: 10 ~ 12 min.
Ingredients:
  • Desiccated coconut powder – 1 cup
  • Mawa/ Khoya/  Milk powder – 1 ½ cup
  • Condensed Milk / Milkmaid – 1 can
  • Cardamom powder – ½ tsp.
  • Almond flakes – ½ cup
Method of Preparation:
~ Pour condensed milk in a microwavable bowl. Add coconut powder, milk powder & cardamom powder and give it a stir.
~ Microwave high for 4 minutes.
~ Take out the dish (be careful, the dish will be really hot at this point) and gently mix everything.
~ Crush the almond flakes in hand and mix it in.
~ Microwave for another 3 or 4 minutes at 1 minute interval. Each time mix it thoroughly. You can see that it all starts to come together.
~ Grease your hand with ghee
~ Alternatively, you can grease a plate and flatten the mix in it and cut in burfi shapes.
~ Delicious burfi’s are ready in minutes. Seriously I took more time to write this post than do burfi. J
 
sending this to Radhika's Diwali Special - Sweets & Savories event
Anu's Diwali - Festival of Lights
Kushi's My Diwali - My Way
Pari's Only Sweets & Desserts hosted by Gayathri

Denny & Krithi's Serve it Series


Tuesday, September 27, 2011

Pineapple Gojju / Menaskai/ Pachadi

It's a blog hop day. This is my third time in this series. I had to blog hop Rinku's Kitchen Treats. Rinku is from Kerala and has an enchanting collection of recipes. It was a pleasure going through her space. It's filled with colorful images of the dishes. It's a feast to eyes. Picking what to cook was a challenge in itself. After shortlisting 5 or so, I wanted to try something authentic Kerala cuisine. But one of my favorite pineapple gojju made the cut. My mom makes this often using mangoes/ pineapples during festivals and it's gone in jiffy. This is commonly made during festivals and weddings in B'lore. I did not make much changes to her recipe since I wanted to see how it turns out. Note to self - should sometime post our konkani style recipe too. Below recipe turned almost close to taste as we do it. Do try out this simple recipe.


Serves: 4 | Prep Time: 10 min. | Cooking Time: 20 ~ 30 min.


Ingredients:

  • Pineapple pieces - 2 cups
  • Tamarind - 1/2 tsp. extract
  • Chili powder - 2 tsp.
  • Turmeric powder - 1/2 tsp.
  • Jaggery - 2 tbsp full
  • Grated Coconut - 1 cup
  • Green Chilies - 2
  • Oil - 1 tsp.
  • Mustard seeds - 1 tsp.
  • Red chilies - 2
  • Curry leaves - 7 to 10 leaves
  • Salt to taste


  •  Method of Preparation:

    ~ Grind coconut and green chilies to make a fine paste.
    ~ In a heavy bottomed pan, add tamarind extract with half a cup of water and bring it to boil.
    ~ Add chili powder, pineapple pieces and salt. Stir and cook for 5 minutes. Cover and cook for another 2 min.
    ~ Now add coconut paste, jaggery and continue to cook until it masala thickens. Once done remove from heat, prepare the seasoning and pour it on top & close the lid.
    ~ For seasoning, heat oil in a small pan, add mustard seeds. Once it splutters, add red chilies and curry leaves.


    ~ Note that if you let it sit for some hours and reheat to serve, it tastes even better, since the fruit pulls in all the spices.


     This is off to Radhika's Blog Hopping event


    And to Nayna's Flavours of South India

     to MMK series Vrat ka Khana by Kalyani

    Update: Sending this to Richa's F for Fruit Curries event via Charitha.


    Sunday, September 25, 2011

    Kande Bhaaji/ Onion Bhaaji

    Kando or Onion is such a staple vegetable that everyone will have it in their pantry. Aayi would sometime prepare this when she was on time crunch. Today I made this coz that is all I had it my pantry. The simple ingredient list and the ease of preparation will make you want to try this recipe.
    Serves: 4 | Prep. Time: 5 min. | Cooking Time: 10 min.

    Ingredients:
    ·         Onions – 5 (About 3 cups when cut)
    ·         Tomato – 4 (About 2 cups when cut)
    ·         Garlic – 4 cloves (cut into strips)
    ·         Turmeric powder – ½ tsp.
    ·         Chili powder – 1 tsp.
    ·         Coriander / Dhaniya powder – ½ tsp.
    ·         Cumin / Jeera powder – ½ tsp.
    ·         Oil – 1 tsp.
    ·         Salt to taste
    Method of Preparation:
    ~ Peel the onions and slit them into thin strips.
    ~ Wash and cut the tomatoes into thin strips.
    ~ Heat oil in a cooking pan and add onions and garlic.

    ~ Cook on high heat until onion starts to turn translucent. The idea on high heat is so that onion doesn’t leave water and stays crunchy.
    ~ Reduce the heat and add turmeric, cumin, coriander and chili powder. Mix them well.
    ~ Add tomatoes and increase the heat again to cook the tomatoes.

    ~ Add salt and switch off the heat once tomatoes are done.
    ~ Bhaaji can be served with Chapati, puris or Lime Rice.
    Related Posts Plugin for WordPress, Blogger...